This easy homemade kombucha recipe and tutorial will teach you how to make kombucha at home. Gather your supplies and customize your kombucha to have the perfect amount of tart and sweet!
My first experience with kombucha tea was a lot like my experience with dairy kefir: unpleasant.
It was too tart, too fizzy, and too expensive.
But I’ve been tinkering with brewing a kombucha recipe at home and now I look forward to drinking a glass of homemade kombucha every day!
WHAT IS KOMBUCHA?
For those who have never heard of kombucha before, here’s a quick lesson.
Kombucha is a fermented sweet tea. It’s packed with healthy bacteria that promote good gut health, and it’s full of vitamins and healthy acids too.
Do you know how yogurt is good for digestion because of the probiotics?
Kombucha is kind of the same, except it’s made from tea instead of milk. You also drink kombucha, as opposed to eating it with a spoon (like yogurt).
WHY DRINK KOMBUCHA
Although there haven’t been many formal studies done on the benefits of kombucha, fans will tout all sorts of benefits of kombucha.
I personally have experienced better sleep, bowel regularity, and a lot less anxiety as a whole.
My husband has been drinking it too and the biggest benefit for him has been digestion. He no longer experiences acid reflux.
We know these benefits are from kombucha because we’ve been drinking it daily now for over 3 months. The one week we went out of town on vacation and didn’t drink kombucha, our entire digestive systems were off.
A few days after coming home and resuming our daily kombucha? Everything was back to normal!
HOMEMADE KOMBUCHA VS. STOREBOUGHT KOMBUCHA
It wasn’t that long ago that kombucha wasn’t available commercially. You had to either know someone who brewed it or be willing to schmooze it up with a farmers market vendor in hopes they knew someone who did.
Today though, you can walk into almost any supermarket and buy a bottle of kombucha. Most stores even have organic and raw varieties too. I just have one big problem with that.
The cost.
One 16-ounce bottle of store-bought kombucha costs anywhere from $3 to $5, depending on where you live and where you buy it from. Even on sale at $2.50, the price is pretty steep.
But if you learn how to make kombucha at home, you can get your cost down to dirt cheap – just a few pennies per 16 ounces!
This kombucha recipe tutorial is for those who want to learn how to brew kombucha while making the bare minimum investment. We’re all working within a budget, and I want you to see that making kombucha doesn’t take a lot of money, nor does making healthy changes in general.
With that said, there are plenty of shortcuts you can make along the way if you’re short on time OR don’t have the patience or resources to collect the supplies needed. I’ll note those shortcuts along the way.
HOW TO MAKE KOMBUCHA AT HOME
Learning how to make kombucha at home is kind of like learning how to get a sourdough starter going or how to make kefir – once you’ve gone through the steps a couple of times, it’s easy to make it part of your daily routine!
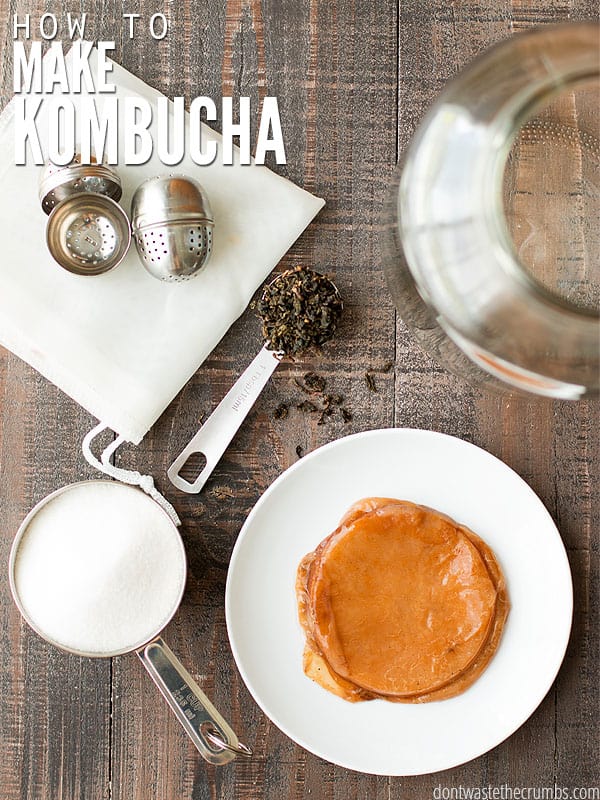
SUPPLIES FOR MAKING KOMBUCHA
Here are the supplies and ingredients for making kombucha at home.
** See my notes below for finding the best deals on these kombucha recipe supplies.
HOW TO BREW KOMBUCHA STEP BY STEP
Ready to learn how to brew kombucha? Let’s get started.
Step 1. Fill a medium pot with water and bring it to a boil. Meanwhile, fill a tea ball or re-usable tea bag with 1 Tablespoon of loose-leaf tea.
If you start to research the best tea for kombucha, you’ll quickly find yourself in a rabbit hole of information that will leave you more confused than when you first started. To keep it simple, I recommend using either oolong tea or this delicious starter tea blend from Kombucha.com.
If you choose to use pre-filled tea bags, you’ll need 6-7 bags per batch of kombucha. Note that in the long run, using loose-leaf tea is more cost-effective and I think brews better-tasting kombucha.
Step 2. Place the filled tea balls in the glass gallon jar. When the water is boiling, carefully pour the water into the gallon jar and let the tea steep.
Personally, I let it steep for at least two hours and haven’t found any bitter taste in my tea. I attribute this largely to using quality tea in the first place.
If you’re not sure if your tea will be bitter after a long brew, you can either make a test cup of tea beforehand or let the tea steep for a shorter time frame.
Step 3. When the tea is cool enough to touch, remove the tea balls from the glass gallon jar. I have a pair of tongs with silicone tips that I really like to use, but a pair of regular tongs will work too.
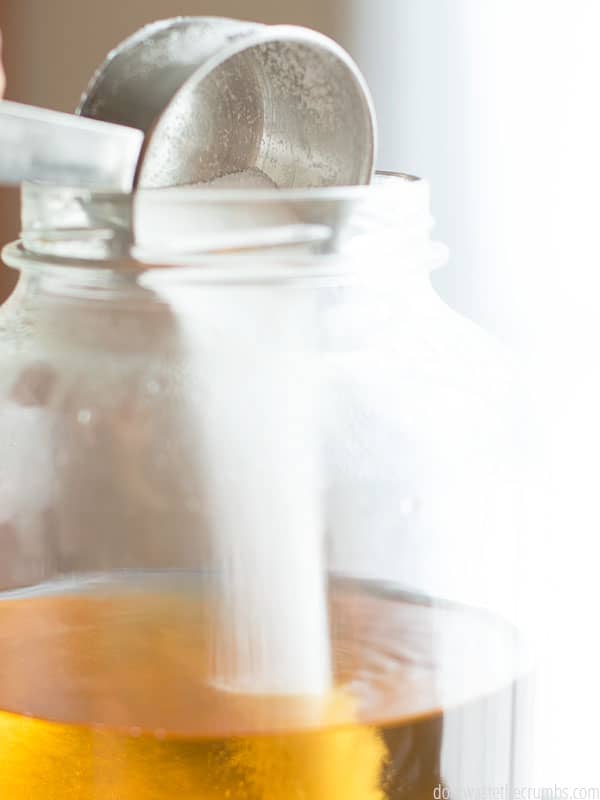
Step 4. Measure 1 cup of sugar and pour it into the tea. Stir until the sugar is completely dissolved and let the tea cool completely.
Step 5. When the tea is completely cool, add the Kombucha SCOBY and 1 cup of kombucha from a previous batch. The SCOBY might sink to the bottom, and that’s fine.
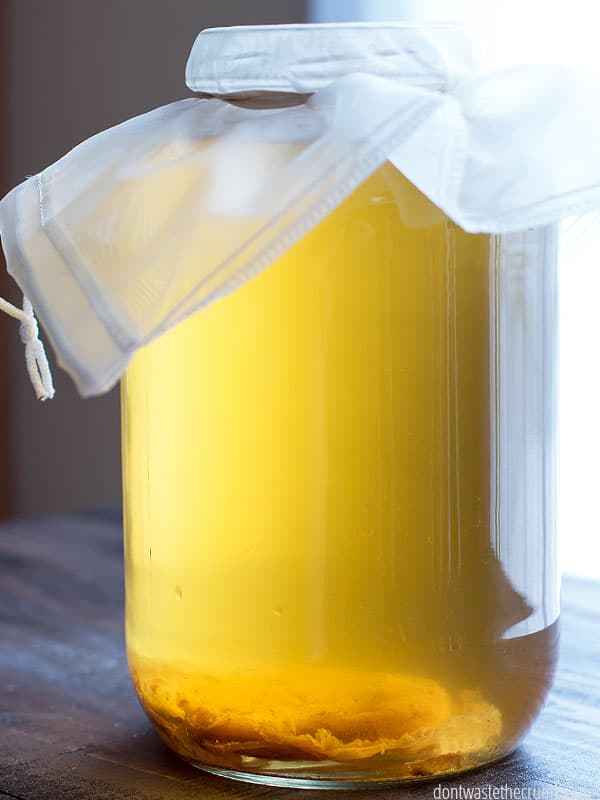
Step 6. Add water to the glass gallon jar until it’s nearly full, leaving about 3-4″ of space from the top.
Step 7. Place the cheesecloth or nut milk bag over the opening of the glass gallon jar and secure it tightly with a rubber band.
Step 8. Place the jar in a warm place in the kitchen, out of direct sunlight. I place my jars on top of the fridge. You can cover the jars with a towel if your fridge is in direct sunlight.
Step 9. Let the kombucha sit undisturbed for 4 days at room temperature, then start tasting.
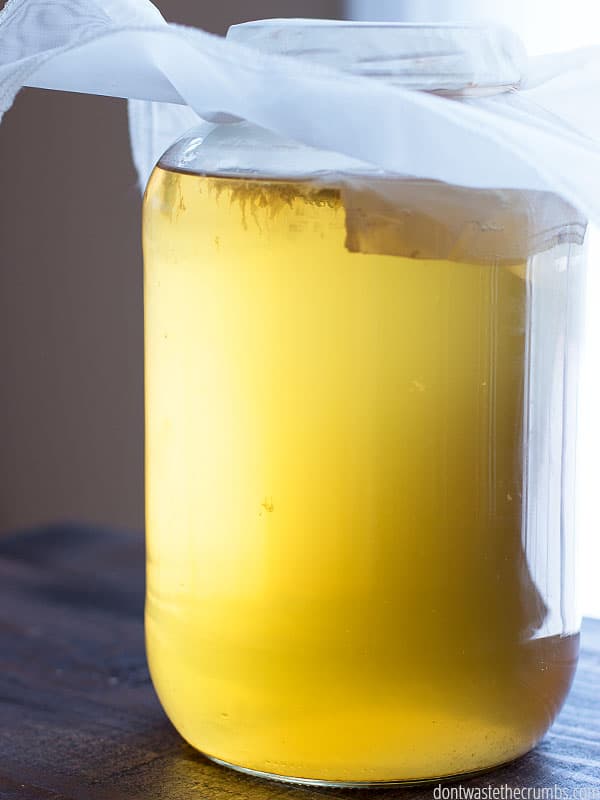
HOW TO KNOW WHEN YOUR KOMBUCHA IS DONE
Your kombucha DIY is done when it has passed three tests.
- The pH test. Kombucha is safe to drink when the pH level reads 4.6 or lower.
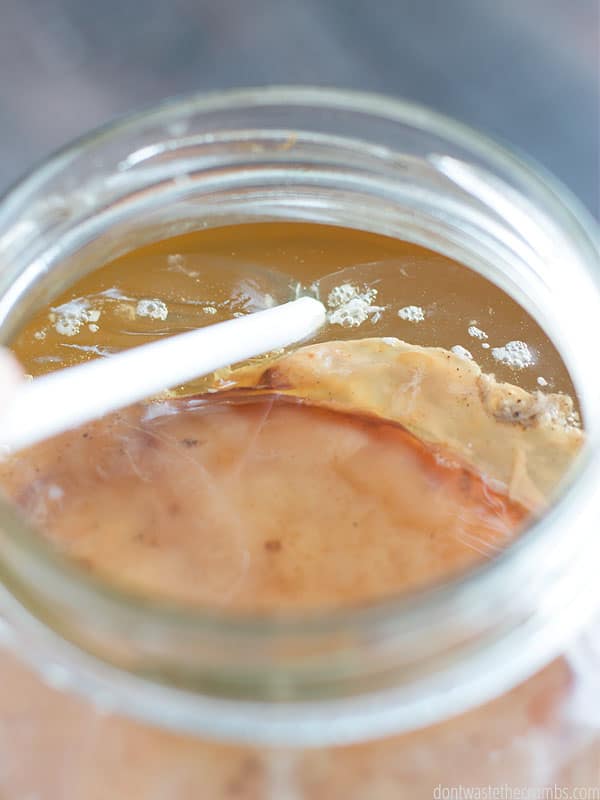
- The SCOBY test. Every time you make this kombucha recipe, a new SCOBY will automatically form at the top of the kombucha. The SCOBY should be clear(ish) and thick(ish) and have a gel-like texture. See the picture below for an example.
- The taste test. Taste your homemade kombucha to see if the desired amount of sugar has been converted to acid. I prefer my kombucha to be tart with practically zero hint of sweetness. You may prefer it to be just slightly sweet. You’ll be able to better judge whether kombucha is ready using the taste test after 2-3 batches. Meanwhile, though, it’s safe to drink so keep on brewing!
CONTINUE MAKING HOMEMADE KOMBUCHA
When your homemade kombucha is done, it’s time to make another batch! Here’s how:
- Put your SCOBY and 1 cup of kombucha in a large glass measuring cup. Cover with the cheesecloth or nut milk bag.
- Pour the rest of the kombucha into clean jars. Any jars will work – brand new quart mason jars or re-used spaghetti sauce jars. I like to use a set of swing-top bottles similar to these that I found at ALDI. I also use a stainless steel mesh strainer to catch any fermentation strings that might have formed during brewing.
- Rinse out the gallon glass jar and make your next batch of kombucha!
HOW TO MAKE KOMBUCHA FLAVORS
The above tutorial is for unflavored kombucha. But that’s not always super fun! There are a few different ways to flavor kombucha by adding fruit juice or herbs. And you don’t even have to do a second fermentation (which is a slightly advanced step anyway unless you want carbonation).
You can follow my flavored kombucha tutorials:
Rose Hip and Hibiscus Kombucha // Strawberry Lemonade Kombucha
KOMBUCHA RECIPE FAQS
Can I dehydrate kombucha and use it as a starter at a later date?
No, you can’t dehydrate kombucha. To make it go dormant, put your SCOBY in the fridge with a little tea. Store it there and use it when you’re ready.
Can you use decaffeinated tea for making kombucha? What about herbal?
Yes, you can use decaf tea. Choose whatever tea you enjoy drinking. Herbal tea doesn’t work as well for making kombucha – it doesn’t have enough to feed the SCOBY. However, you can use a mixture of different teas to get the flavor you prefer and still have a successful kombucha.
What is a SCOBY?
Scoby stands for symbiotic culture of bacteria and yeast, and it’s the fermented culture you use in your kombucha recipe. A new layer of the SCOBY is produced every time you make kombucha.
FINDING THE BEST DEALS FOR KOMBUCHA DIY SUPPLIES
I mentioned earlier that this homemade kombucha recipe requires a minimum investment – it’s like the bootstrap version of kombucha tutorials! With that said, you will have to acquire a few materials to get started. Whether you do this all at once or over a few weeks is up to you (and if you don’t want to bootstrap it, scroll down for an affordable all-in-one option).
GALLON GLASS JARS
I bought a gallon pickle jar from Walmart for about $3.50 and my family ate the pickles (which took about 3-4 weeks). When the jar was empty, I filled it with warm soapy water and turned it upside down. After 3 days, I rinsed it out, washed it again, and let it dry.
If you don’t want to go through this hassle, you can buy a gallon glass jar from Amazon for about $9. You can also look at garage sales and thrift shops, but I found that thrift stores especially cost more, and they didn’t come with a lid AND I wasn’t confident about the cleanliness of the jar.
TEA
There really is a ton of information and opinions when it comes to the best tea for brewing kombucha, but the short answer to all of it is to brew a tea that you enjoy drinking. Oolong tea is a very mild tea, and this is a delicious tea blend that combines green tea and black tea.
If you try a tea and aren’t sure if you like the flavor, consider brewing it stronger or weaker. I actually prefer making kombucha using two balls of tea (using 2 Tablespoons in 2 tea balls) as opposed to just one.
You can get your tea here.
TEA BALLS OR RE-USABLE TEA BAGS
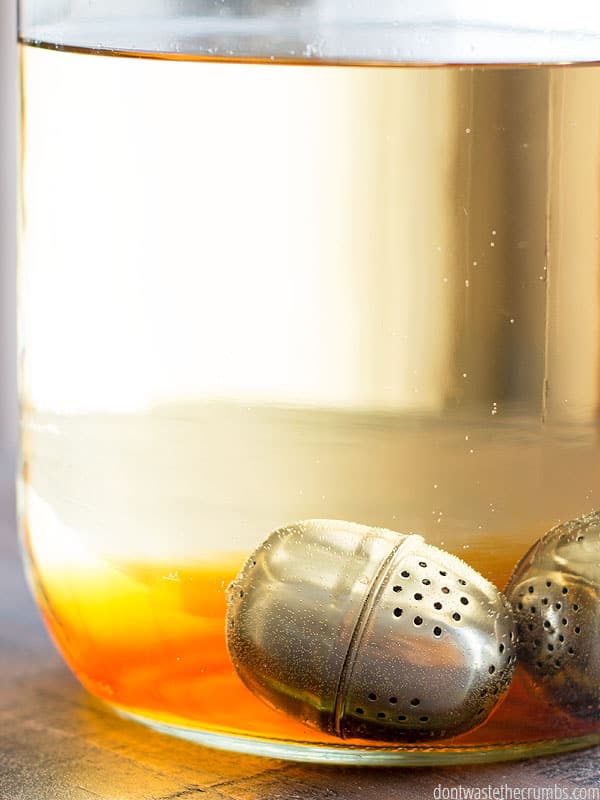
I happened to find a tea ball at a garage sale not too long after I bought the pickles, but if you don’t have such luck, you can get stainless steel tea balls on Amazon. They likely come with a chain, but I found the chain got in the way, so I took it off.
SCOBY
The SCOBY is likely the most difficult supply to acquire. You want to be sure you’re starting with a high-quality SCOBY since the health of your kombucha essentially depends on it. You also want to make sure the SCOBY is healthy from the get-go because if you take care of it, a SCOBY will last practically forever!
Getting a SCOBY from a friend or neighbor or family member who brews kombucha will be the most cost-effective. However, you can order one too. I recommend this one.
You can get your SCOBY here.
KOMBUCHA FROM A PREVIOUS BATCH
This is also tricky to obtain unless you’re okay going to the store and buying a bottle of organic, raw kombucha just to make your own. Which you can do, but it’s another expense.
One of the plus sides to buying a SCOBY is that it comes with the starter liquid, so you don’t have to go out and buy a special bottle of kombucha just to get started – you already have it!
SUGAR
Like tea, the kombucha world has tons of opinions about the best sugar for your kombucha recipe. The purpose of the sugar is to feed the bacteria, and there’s very little IF ANY sugar left at the end of the brewing process, so, in my opinion, it’s best to go with the more affordable option, plain white sugar.
If you are concerned about plain white sugar being processed at all, you can go one step up with organic sugar. There is no need to get any less processed or more expensive than organic sugar though, because kombucha doesn’t brew as well with brown sugar, raw sugar, honey, maple syrup, or any other more natural sweetener.
Even though we’ve made it a goal to eliminate processed white sugar from our house, I still buy it solely for the purpose of making kombucha.
CHEESECLOTH OR NUT MILK BAG
I use a nut milk bag because it’s what I already had on hand, so if you have cheesecloth, go ahead and use that. You can even use a coffee filter too, but I found that using the nut milk bag was a more sustainable and reliable method (the coffee filter kept getting wet when I put the jars on my fridge, and the wet filters attracted fruit flies).
My bags are similar to these nut milk bags, and I recommend buying a 2-pack if possible. That way when you start enjoying the benefits of kombucha and want to brew more than one gallon a week, you already have a second bag!
PH STRIPS
These are optional, but they are very handy to have on hand, especially when you’re first starting. I have these pH strips designed for winemakers, but they contain the pH range for kombucha that’s safe to drink, so they get the job done.
EASIER HOMEMADE KOMBUCHA
This tutorial is my cheap version of how to make kombucha at home. It’s essentially hunting and gathering the supplies you’ll need over time to eventually brew your own kombucha. If you’d prefer to get started ASAP without the hassle of hunting and gathering, I suggest a kombucha starter kit. It includes:
- certified organic black and green whole-leaf tea leaves
- SCOBY and starter liquid
- organic cane sugar
- jar and cover
That will cover most of the basics you need for kombucha brewing!
You can get your Starter Kit here.
Another way to brew kombucha is through a continuous brew. Find out how I worked that method HERE.
Do you brew kombucha? Do you have any questions about how to make it yourself? Leave your comments below!
MORE HOMEMADE FERMENT TUTORIALS
Fight Inflation Workshop!
Sign up for my FREE Fight Inflation Workshop and learn simple strategies to save money, even with rising food costs!

